Garbage Disposal
Garbage Disposal
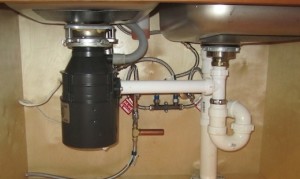
Your garbage disposal is designed to grind food waste. Only put down the disposal what it is designed to have. Remember most of the sewage can end up in water sheds or your septic tank and leach field so be kind to the environment. Please, do yourself a favor and read your owners manual or download one for your make and model! It will be your best friend should you r disposal stop working or get plugged or jammed.
The disposal has an electrical connection so unplug it or turn off the breaker in the service panel before starting any work on this appliance.
Two things I learned the hard way not to put down the disposal…cabbage for one. And the other is grease from cooking. The cabbage will just shred and it will plug your drain. The grease will line your drain pipes and cause food and debris to stick and cause a plug over time.
The most common problem is a jam inside the disposal from a hard piece of debris like glass or a seed. The object gets stuck between the interior wall and the grinder. If this happens, it may trip the reset button on the disposer. Use a flashlight and look down inside the disposal to see if you can visualize what has jammed the unit. If you can see it you may be able to reach inside with a pair of tongs and remove it. Word of caution, be sure the power is off or disconnected before reaching inside.
Hopefully your disposal came with a wrench to help free the jamb. If it does have a wrench, there will be a hole in the bottom of the disposer to insert the wrench. Insert it and work it back and forth to see if you can free the grinder. Once it makes a full revolution, look inside to see if you can remove the object. If you do not see anything, it is possible you may have forced the object on through and into the drain.
Replacement
If the above procedures do not fix your disposer, the motor may be defective and the unit will need replaced. Replacing with the same make and model can be fairly easy. If a different model, you may need to replace the sink drain basket. The good news is that the disposers come with excellent instructions. If you are one that can read and follow instructions you can do this yourself. The most challenging procedure for people can be the electrical connections. Even that is detailed in most instruction manuals.
P-Trap Removal
October 4, 2014 by Rex Splitt • Plumbing • Tags: P-trap, Plumbing • 0 Comments
P-Trap Removal
Is the sink full of water? If so, you need to remove the water from the sink before proceeding. Otherwise, you are going to get a bath when you remove the trap!
Tools needed:
If you have a garbage disposal, see that section for checking and clearing clogs in the garbage disposal.
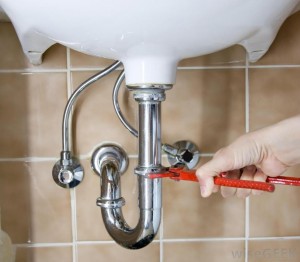
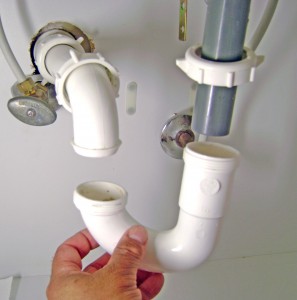
Start with the upstream trap. This may be connected to your garbage disposal if you have one. Place some rags on the bottom of the cabinet and set the bucket under the trap. Use the pliers or pipe wrench to loosen one of the nuts on the trap. Be sure to move slowly and hold on to the pipe where you are working. You only want to loosen the one and not the pipe and area above or down the line.
Don’t be concerned when water starts leaking, that is normal. Loosen the nut completely and then move to the other nut on the trap. When this nut comes loose the trap will be free so hang on to it. Once the trap is off, dump the water in the bucket. There should be plastic or rubber washers at these connections. Save them for now. Look in the trap you just removed. Most likely you will see black, ugly looking goo. If this is mostly or completely plugged, this was your problem. If not, your problem may be further down the line or between the area you are working and the sink. Shine a light down the sink drain from above and see if there is anything visible.
If you have another P-trap below the other sink bowl, follow the above procedure to remove that trap and check it.
Replacement
Before you reconnect the trap pipe, I recommend you replace the plastic or rubber seals at the nuts. This can save time troubleshooting leaks. Fit the trap back on the pipes and turn the nuts hand tight. Realign everything and use the pliers or wrench to snug up the nuts. Do not over tighten! Turn the water on and check for leaks. If you have a small drip at one of the nuts you just removed, tighten is a bit more. Check again. Be sure to check other connections that you did not work on as you may have disturbed the connections.